Learning Studio / features
Configure a checklist block
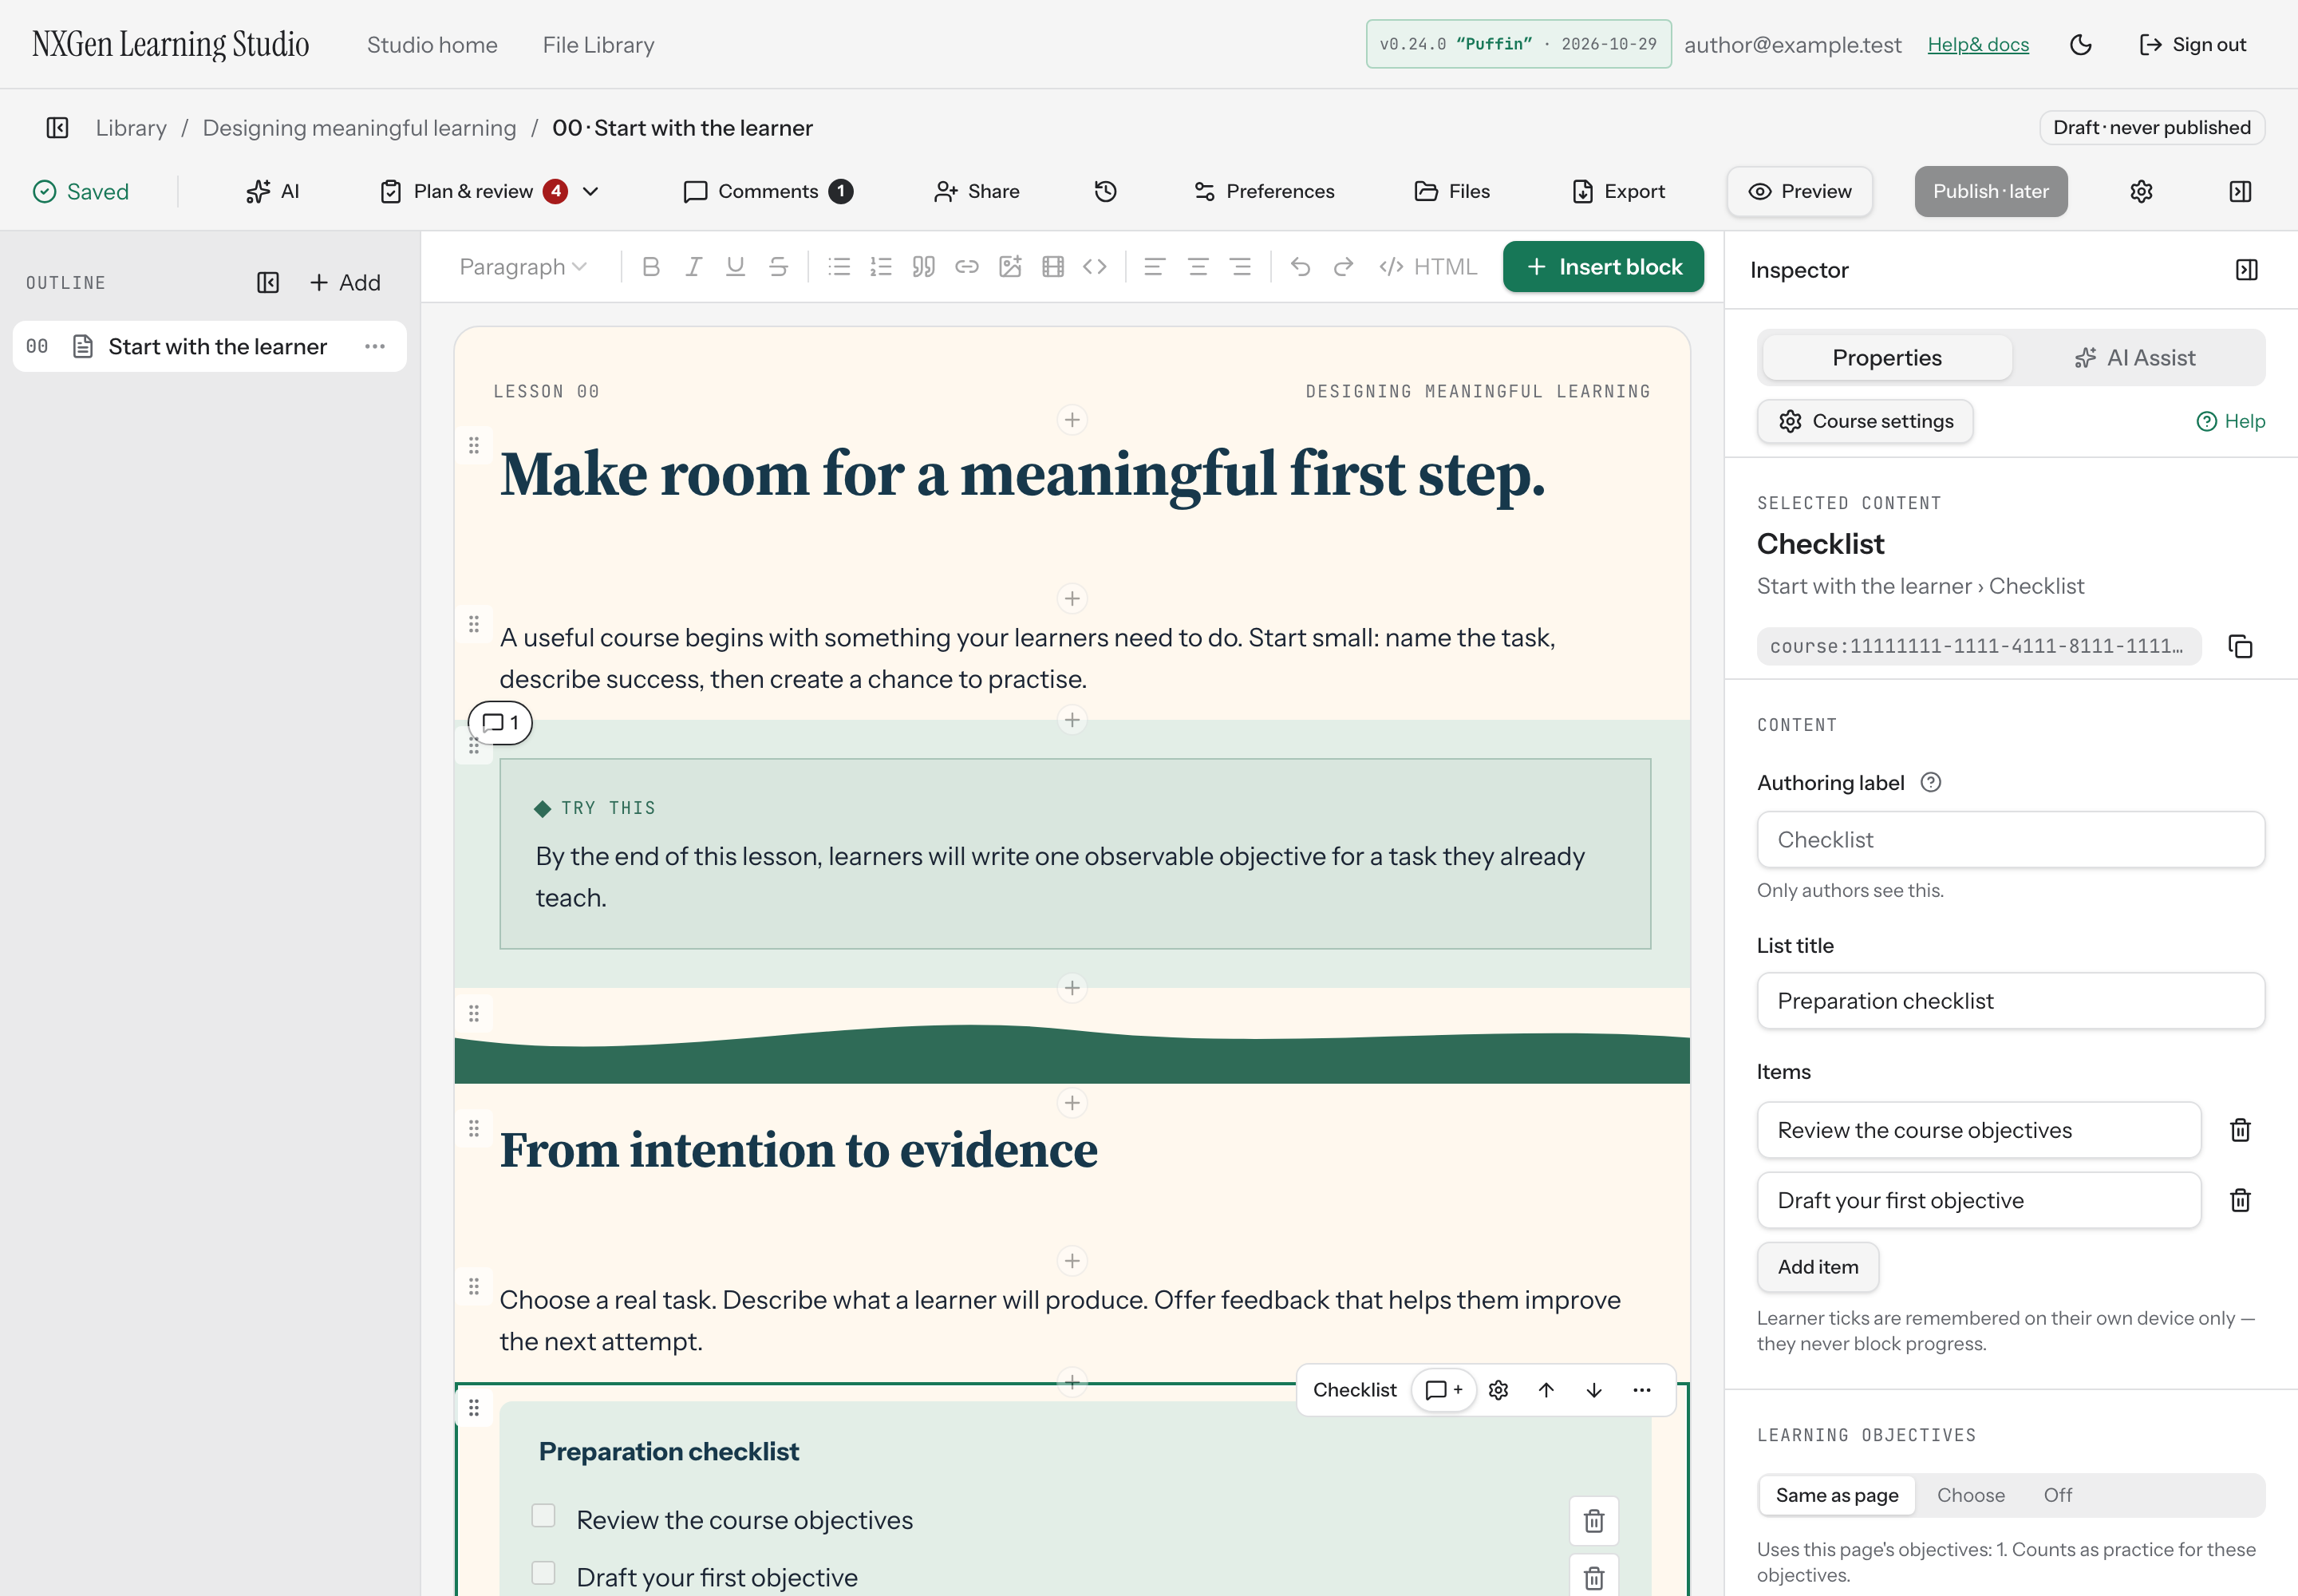
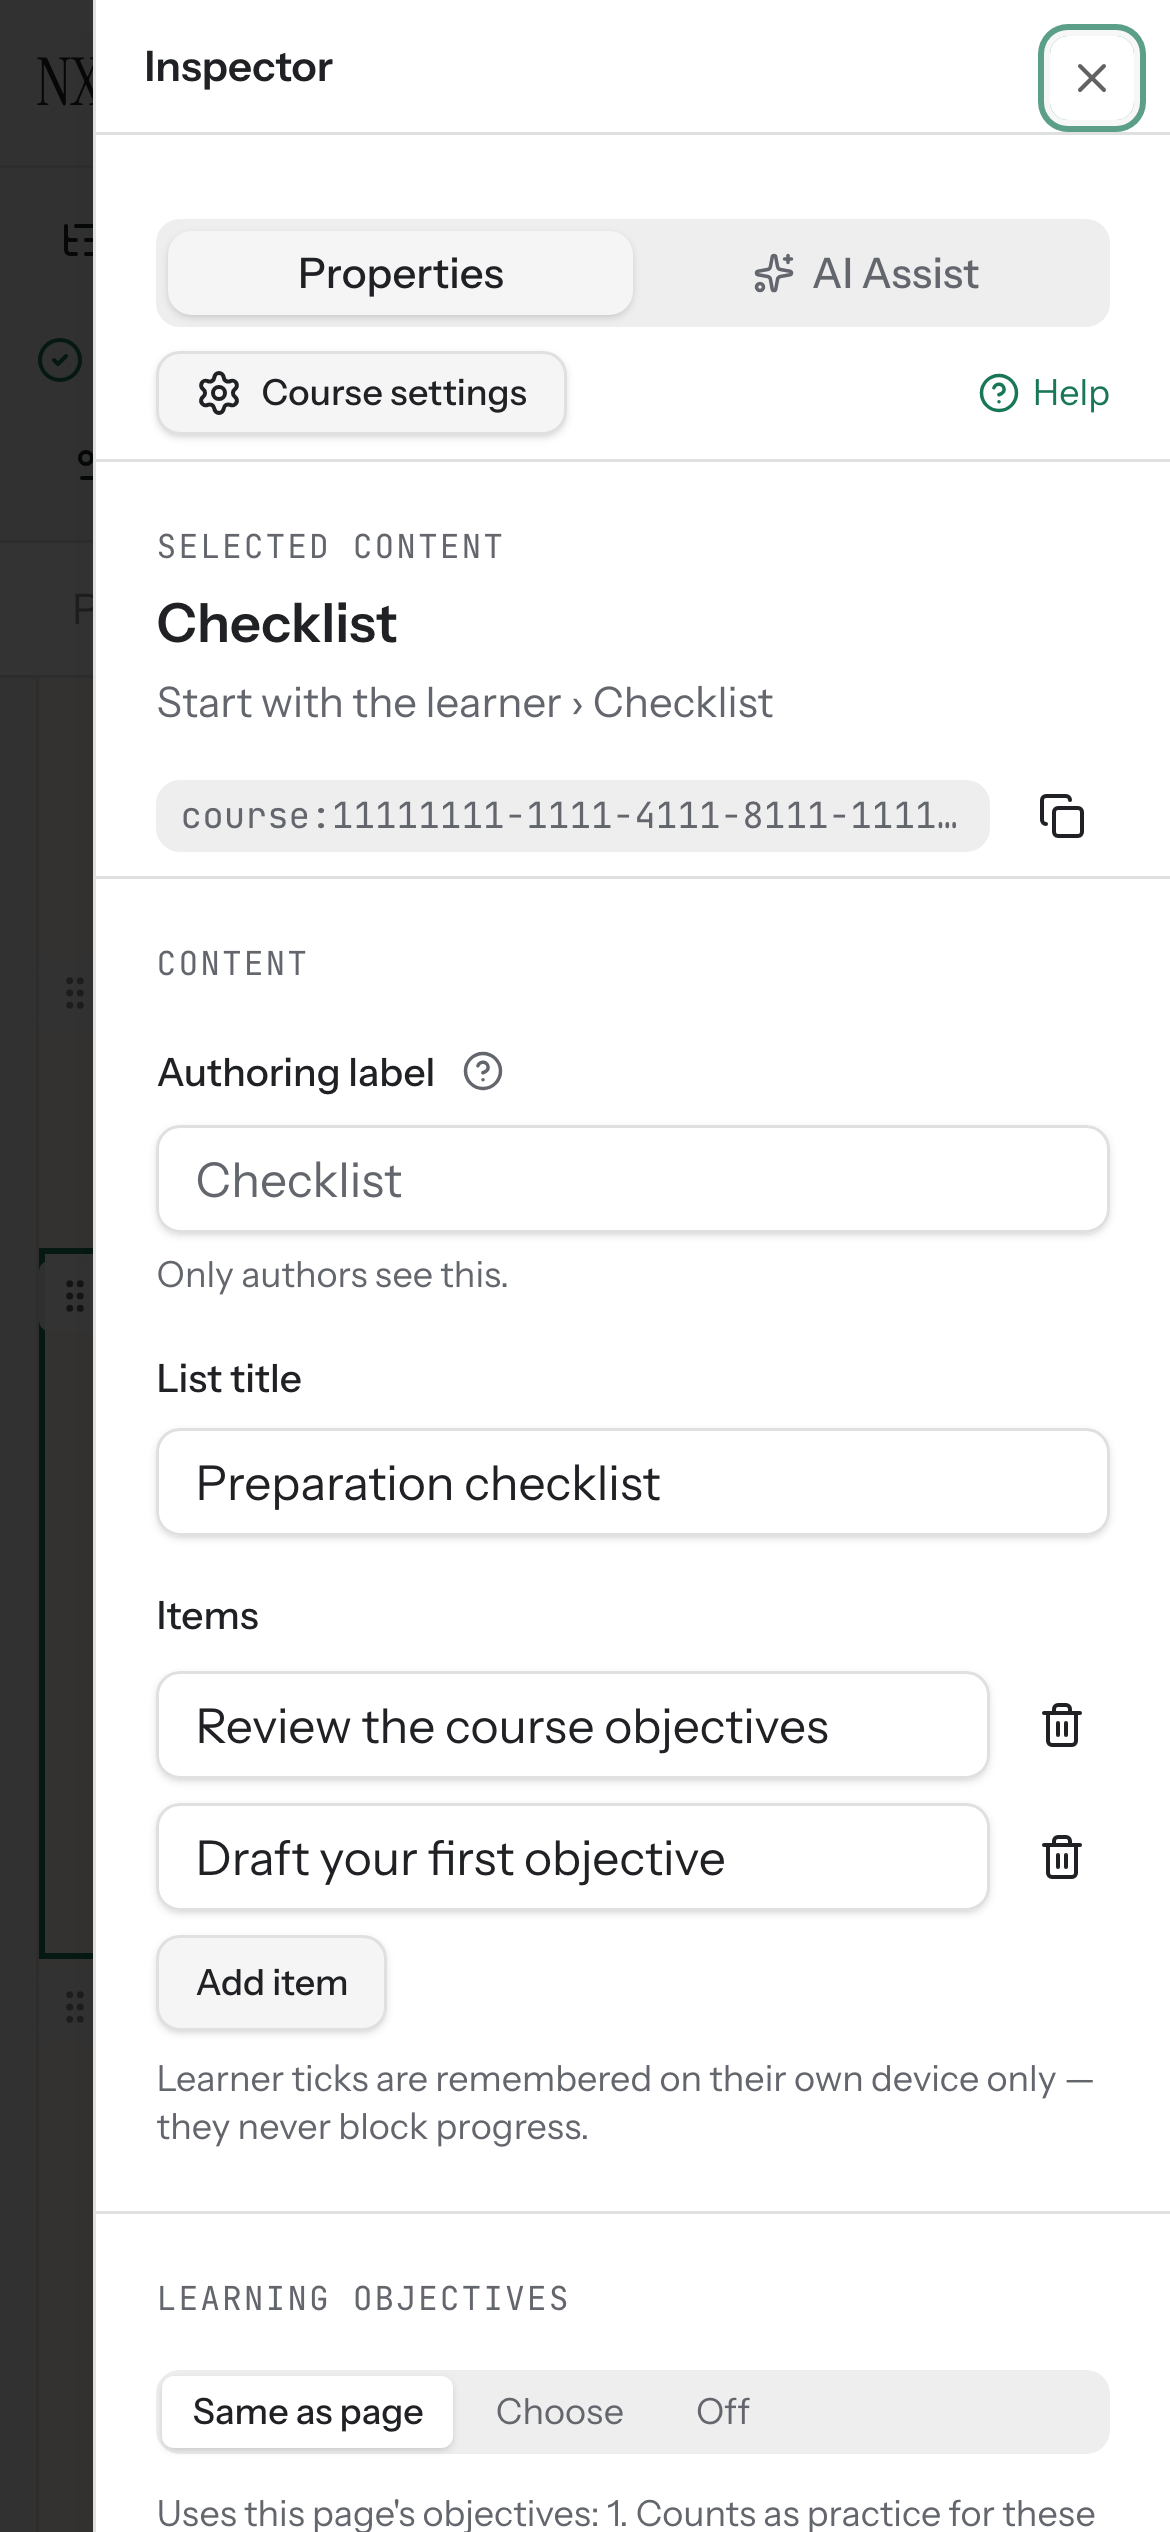
Edit checklist content directly on the canvas or in Properties.
Configure a checklist block
Section titled “Configure a checklist block”A checklist block gives learners a simple list they can tick off as they go. Use it for self-checks, pre-work reminders, or any set of steps learners should confirm on their own.
Edit the checklist directly on the canvas, or use the inspector.
- Select the checklist title on the canvas and enter a heading that tells learners what the list is for.
- Select the text of any item to match what learners should check.
- Select Add item to add a new blank line to the list.
- Select the trash icon beside an item to remove it.
A new checklist starts with three sample items so you have something to replace. You can keep at least one item and up to thirty.
How learners use it
Section titled “How learners use it”Learners see the checklist with a checkbox beside each item. Their ticks are saved on their own device only — the list never blocks progress, and a learner’s checked state isn’t shared with you or other learners.
Availability and limits
Section titled “Availability and limits”- A checklist needs 1–30 items.
- You can’t remove the last remaining item.
- Learner ticks are stored locally in the browser, scoped to the course, the learner, and the checklist block, not in your course data.